artymr2
MR2 Deity

- Total Posts : 1105
- Scores: 45
- Reward points: 7867
- Joined: 2011/04/07 19:51:15
- Location: WA
- Status: offline

RE: 1990 GT - The fun begins
2010/03/25 19:13:18
(permalink)
We do have another exhaust, basically comes off the stock dump/cat, goes under the crossmember and splits in 2 forming a "V" shape under the car, continuing with a hot dog each side forming the V and then to 4 inch tip per side. Its all straight through, looks great but is loud with a capital F.
This one has a nice note but is not performance orientated.
We have an Apexi GT exhaust for the Gen 3 conversion.
|
stuka
MR2 Deity
- Total Posts : 1183
- Scores: 113
- Reward points: 4767
- Joined: 2011/04/07 19:51:15
- Status: offline
RE: 1990 GT - The fun begins
2010/03/26 20:08:19
(permalink)
welcome to the forum, nice car amd it sounds like you know what your are doing with it
|
artymr2
MR2 Deity
- Total Posts : 1105
- Scores: 45
- Reward points: 7867
- Joined: 2011/04/07 19:51:15
- Location: WA
- Status: offline
RE: 1990 GT - The fun begins
2010/05/20 00:40:22
(permalink)
Ok, the fun has officially started. Tonight we dropped the motor out of the half cut!!! Woohoo!! It was relatively straight forward really, much easier than i though it would be.. Basically followed a couple of guides on the net, but did a few things differently. The axle nuts were &%$#@ tight (especially one of them) which was interesting as we couldn't use the handbrake etc to stop the hubs turning. Ended up bolting on some nuts on the studs, and using a crow bar through them to stop it from turning, supporting the hub and socket setup with jacks. Also, my 32mm socket wasnt deep enough to reach the nut, so used a 1 1/4 inch truck wheel nut bar, massive extension. We removed both hubs complete with calipers, suspension arms etc (the struts were already gone on the half cut), and dropped the motor, gearbox, half shafts as one unit, using a frame above the car and a chain block. The hardest part was the motor wanted to twist slightly towards the front, causing the left and right engine mounts to bind. a bit of extra jacking from the bottom and rocking and all was sweet. 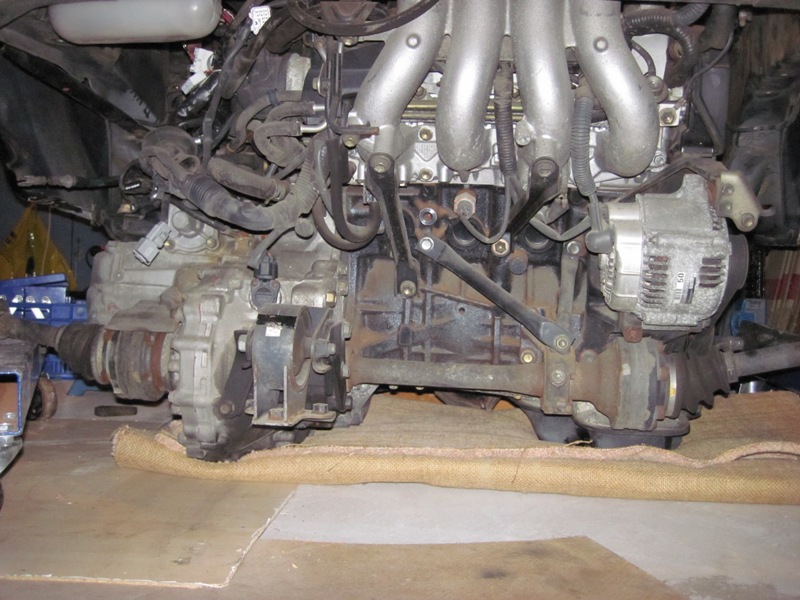 Motor down 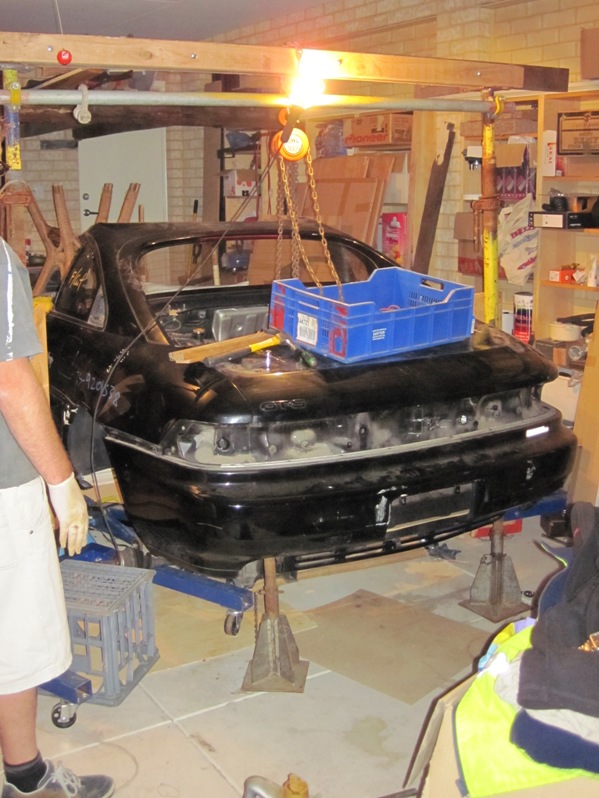 Lifting setup We will now strip the half cut of anything useful and throw the rest away. Then repeat the process on the actual car. We didnt remove the air con compressor (the lines were cut anyway) and didnt remove the clutch slave for the same reason. Figured it would be easier to suss out how to unbolt it when we do the car by looking a t this one when its out of the car and you can actually see it. Out of curiosity, most people on the net say to disconnect the clutch slave cylinder, leaving it connected to the car. Is this purely to save bleeding it later, or am i missing something here? Same with the air con compressor, it is usually removed and left connected to the car, is this purely to save regassing etc? Will do more tinkering during the evenings and on the weekend, hopefully more good progress soon.
|
mr2ns
MR2 Aficionado

- Total Posts : 327
- Scores: 5
- Reward points: 4118
- Joined: 2011/04/07 19:51:15
- Location: Perth WA Australia
- Status: offline
RE: 1990 GT - The fun begins
2010/05/20 15:09:44
(permalink)
yes to clutch and aircon. Its also illegal to let the gas out of aircon. Will cause a hole in the ozone layer above your house. Could also destroy seals.
Also dont just cut the clutch fluid line with a knife :)
Also im sure you know but i when you go to put the eng back in the new car, dont put the jackstands on the rear like you have done for the halfie
|
artymr2
MR2 Deity
- Total Posts : 1105
- Scores: 45
- Reward points: 7867
- Joined: 2011/04/07 19:51:15
- Location: WA
- Status: offline
RE: 1990 GT - The fun begins
2010/05/20 15:47:30
(permalink)
Thanks for the tips. The clutch line has a join not far away, which is the one I undid. I will have a look once the motor is out in the open to suss out the clutch slave arrangement, but is bleeding the clutch more of a pain than trying to unblolt it? Both operations look to be a major pita.
I hope the Gen 2 air con compressor will fit the gen3 engine, can anyone confirm?
and yes re jackstands at rear, will support in front of the rear wheels. might need to get higher stands or sit them on something sturdy to lift the car high enough to drag motor from underneath.
|
greddy_es
MR2 Aficionado
- Total Posts : 756
- Scores: 0
- Reward points: 2258
- Joined: 2011/04/07 19:51:15
- Location: Piara Waters, WA Australia
- Status: offline
RE: 1990 GT - The fun begins
2010/05/20 22:29:56
(permalink)
Gd job Arthur..looking forward to the completion of the project!
|
artymr2
MR2 Deity
- Total Posts : 1105
- Scores: 45
- Reward points: 7867
- Joined: 2011/04/07 19:51:15
- Location: WA
- Status: offline
RE: 1990 GT - The fun begins
2010/03/06 12:20:58
(permalink)
Had some progress recently. Started taking apart bits from the car. Have removed the engine lid and sides, airbox/afm, exhaust, crossmember, undid the axle nuts (one was #$%@#$ tight!!) pulled the shafts out of the hubs (left the strut connected at the top, just undid the 3 lower suspension connection on the body and swung the struts away enough to pull the axles out), disconnected most of the coolant hoses, fuel lines, some of the wiring, shifter cables.
still need to do rest of the wiring, and ac compressor and should be ready to drop out this weekend.
|
just_ace
Moderator

- Total Posts : 2508
- Scores: 89
- Reward points: 4598
- Joined: 2011/04/07 19:51:15
- Location: perth wa Australia
- Status: offline
RE: 1990 GT - The fun begins
2010/03/06 12:40:57
(permalink)
the gen2 AC comp will fit the gen3 fine, the only possible difference is perhaps the wiring/plug may have changed like they did with the alternators etc.
i just dropped the engine outta my sw20....fun isn't it. are you goin to upgrade the fuel pump while your at it?
|
artymr2
MR2 Deity
- Total Posts : 1105
- Scores: 45
- Reward points: 7867
- Joined: 2011/04/07 19:51:15
- Location: WA
- Status: offline
RE: 1990 GT - The fun begins
2010/03/06 18:09:58
(permalink)
Cool re the ac compressor, will save degass/regass.
Pulling the motor/gearbox out is actually not that bad, i thought it would be much worse. if you had a hoist would be much easier again.
I think i will just disconnect the hydraulic line to the clutch slave then bleed it. seems a lot simpler than taking apart the mount clutch slave etc. I just undid the 4 bolts of the mount to the front firewall.
Wasnt going to upgrade the fuel pump, didnt realise they are different. Is it required?
|
artymr2
MR2 Deity
- Total Posts : 1105
- Scores: 45
- Reward points: 7867
- Joined: 2011/04/07 19:51:15
- Location: WA
- Status: offline
RE: 1990 GT - The fun begins
2010/08/06 00:10:33
(permalink)
Did some more work on the car today, and the old motor is out!! Woohoo!! All went pretty well, the left engine mount was binding up as it did with the half cut, but eventually the motor came out. engine being lowered:  engine down and car up:  the old donk:  So now a tidy up of the gen3 engine and install in the car.
|
artymr2
MR2 Deity
- Total Posts : 1105
- Scores: 45
- Reward points: 7867
- Joined: 2011/04/07 19:51:15
- Location: WA
- Status: offline
RE: 1990 GT - The fun begins
2010/10/07 23:31:03
(permalink)
Did a few things recently on the Gen3. Realised that the Gen3 was non abs, so had the abs rings swapped over on the half shafts, this was easily done by a CV repair shop and very cheap. The drivers half shaft was difficult to remove as the bearing was seized up in the carrier thats bolted to the gearbox. Had to unbolt the carrier and pull it out with the shaft. Took off the old timing belt etc and replaced the cam seals and front crank seal. Bought a cheapo Ozito electric impact wrench to undo the front crank bolt, it did it easy. The grunt this thing has is amazing (300NM apparently), especially for the cheap price ~$70. Should have bought it at the start, would have saved a fair bit of time and grunting. Wonder if it would have unbolted the half shaft bolts?? Used a bit of pvc pipe (with another layer glued on the outside for added thickness) and the cam gear bolt to press the seals in, made it very easy as i dint have socket big enough. Had to replace the cam seals again (as a precaution) as the bearing cap edge sliced a very thin layer of rubber off the outside of the seal as they pushed in. I chamfered this very sharp edge of the bearing cap lightly and the seals went in easy after that. Pressing in cam seal: 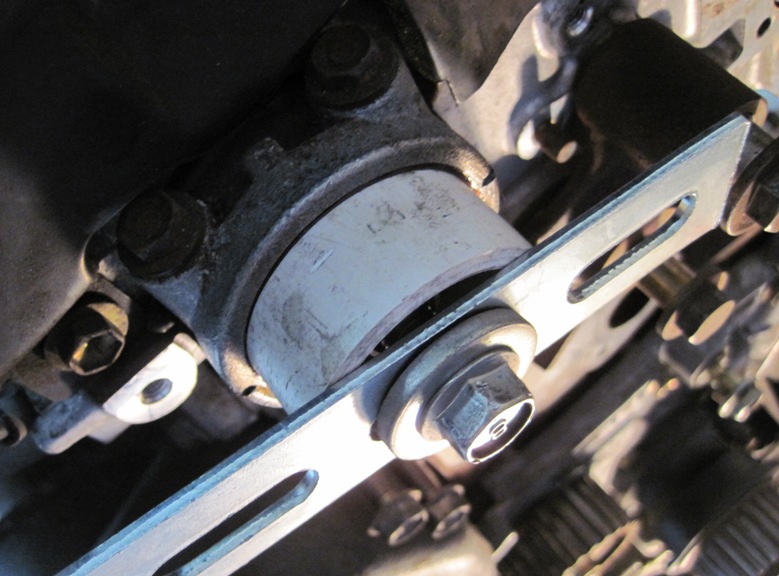 Used a piece of plastic and the timing belt pulley and harmonic balancer bolt in a similar way to insert the front crank seal. Front crank install: 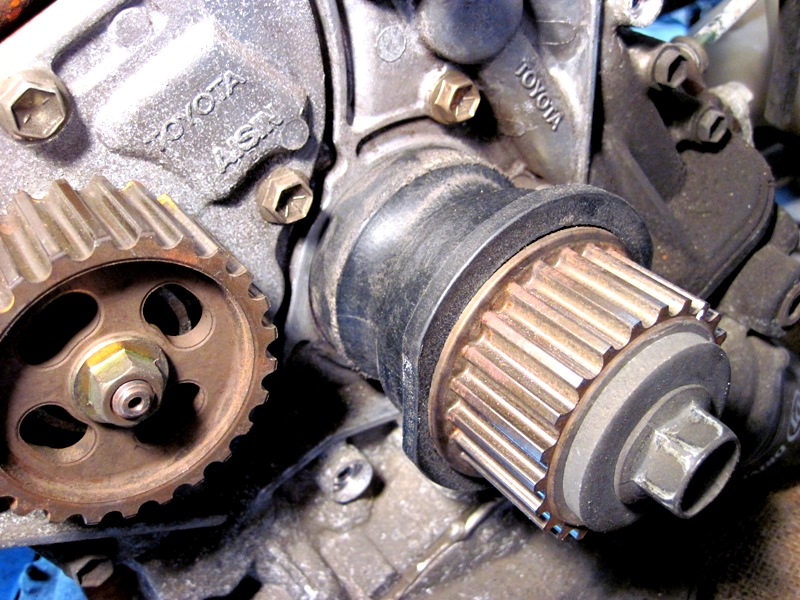 Got a new water pump and timing belt idler pulleys still need to install and then install new cam belt. Will also test the thermostat to check opening temp is ok and to make sure it opens fully. Had a quick play with the thermostat housing this afternoon to try and see how it would look with a quick freshen up. Used a wire brush to clean it up, then the sissal polish wheel with grey paste, then buff wheel with white paste. spent 10/15 minutes total. No where near the finish achievable, can still see a heap of casting/wire brush marks etc, but for the time spent, i think its a pretty good improvement. Before: 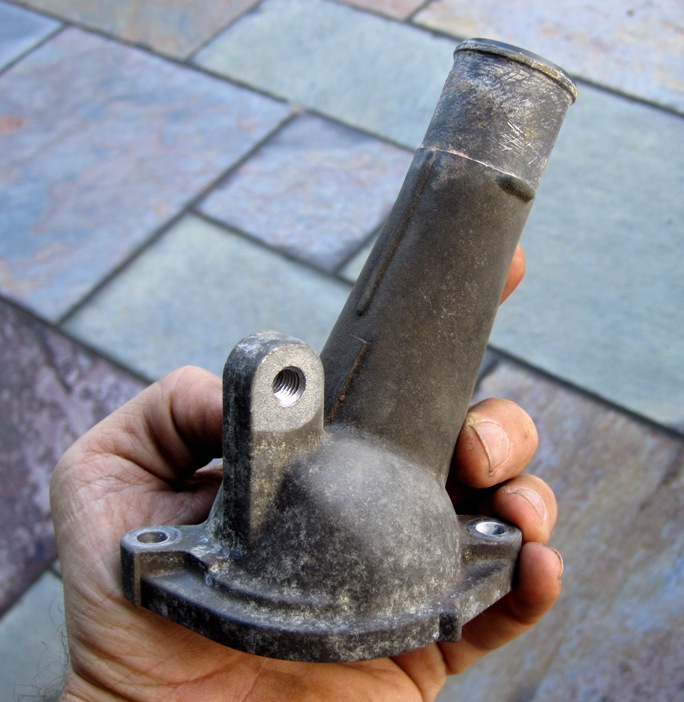 After: 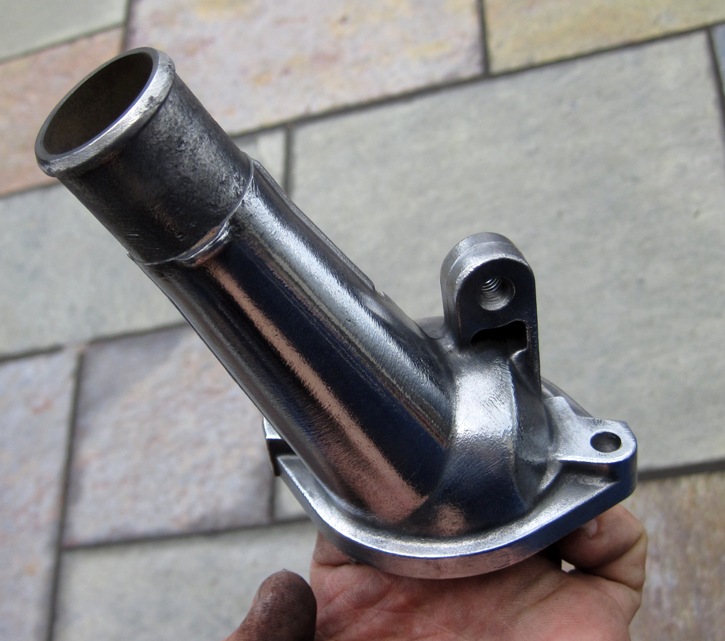 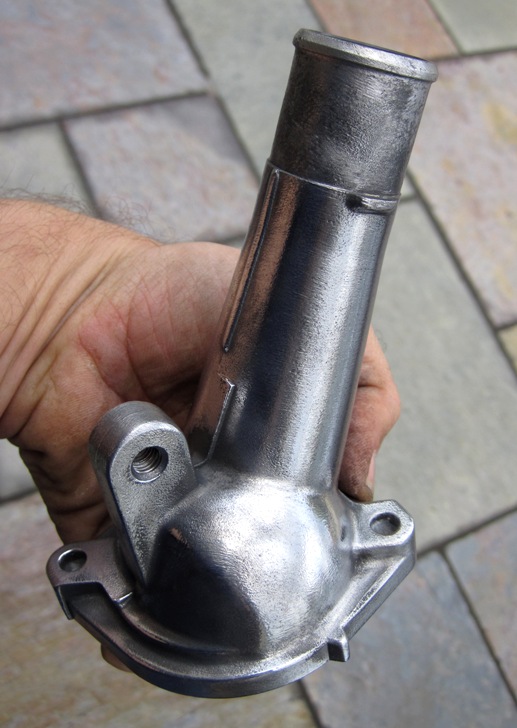 Trying to figure out what other bits to freshen up. Will definitely spruce up the rocker cover though. A big thanks to everyone for their input and help with all my questions, much appreciated. Cheers
|
hobo906
MR2 Enthusiast

- Total Posts : 72
- Scores: 0
- Reward points: 0
- Joined: 2011/04/07 19:51:15
- Location: sydney nsw Australia
- Status: offline
RE: 1990 GT - The fun begins
2010/11/07 10:21:00
(permalink)
|
Reddtarga
MR2 Deity
- Total Posts : 2175
- Scores: 249
- Reward points: 5547
- Joined: 2011/04/07 19:51:15
- Location: Vic Australia
- Status: offline
RE: 1990 GT - The fun begins
2010/11/07 12:07:54
(permalink)
Yeah, looking good, and good luck with the project.
I love that engine hoist setup.
Necessity is the mother of invention as they say lol.
|
artymr2
MR2 Deity
- Total Posts : 1105
- Scores: 45
- Reward points: 7867
- Joined: 2011/04/07 19:51:15
- Location: WA
- Status: offline
RE: 1990 GT - The fun begins
2010/12/07 00:14:27
(permalink)
Cheers guys.
The lifting set up works an absolute treat, much better than we thought it would. Its easily moveable to fine tune the lifting location, and gives clear access under the car etc.
|
artymr2
MR2 Deity
- Total Posts : 1105
- Scores: 45
- Reward points: 7867
- Joined: 2011/04/07 19:51:15
- Location: WA
- Status: offline
RE: 1990 GT - The fun begins
2010/07/25 23:13:31
(permalink)
Had a bit more progress on the car this weekend, fitted the new water pump and new timing belt, and took off the factory dump pipe to replace with ebay version. Taking off the dump pipe was fairly straight forward, all the nuts cracked easily with a breaker bar. As seems to be the norm on the MR2, one of the nuts was inaccessible as its close to the oil cooler and the nut is recessed. So a socket wont fit and a ring spanner wont get enough bite on the nut due it being partially recessed. So I made my own spanner up, bought 2 cheapo ($1.19 each!!) ring spanners from Bunnings, welded the 2 ring ends together (making sure they lined up, used a bolt with 2 nuts) then cut off one of the handles. the effect is a double depth ring spanner which now fitted the nut and it worked a treat. Pic of spanner on nut: 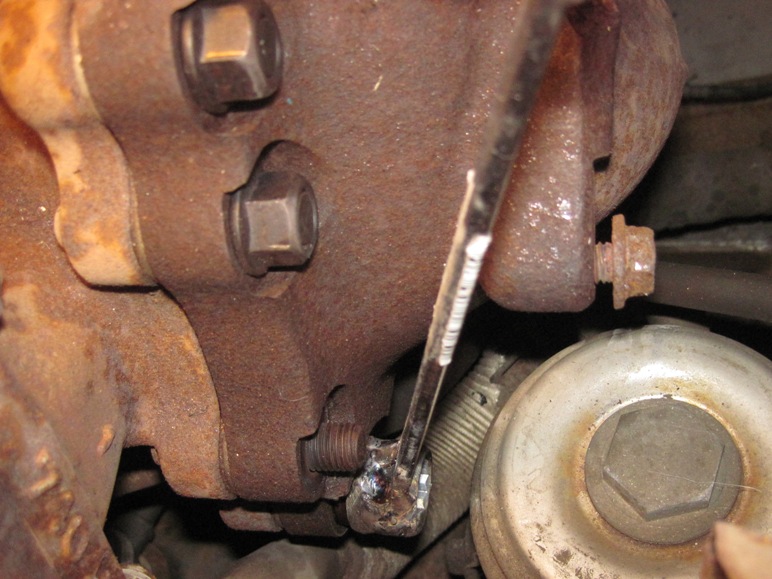 Close up of spanner. 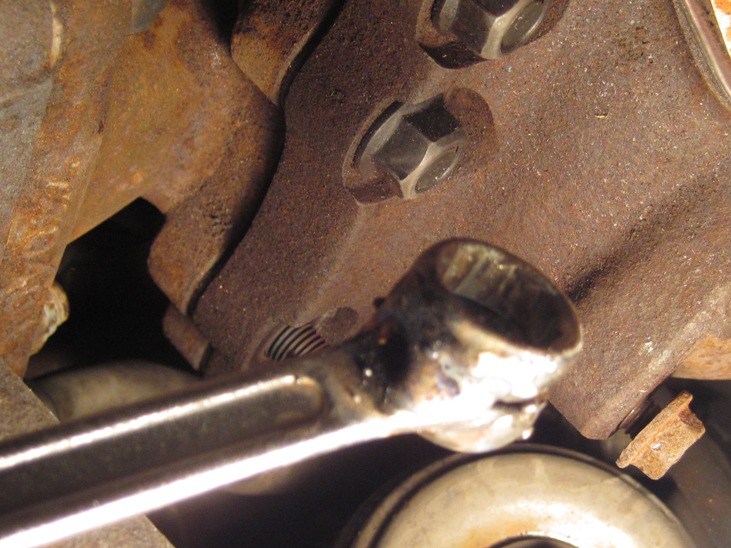 Once all the nuts were cracked and removed, the dump pipe was easy to remove. There was enough clearance to the oil cooler and it cleared the studs. Man, the factory dump and brackets are heavy with a capital F. Cheers
|