2010/12/17 23:14:25
robk
I started working on this tonight.
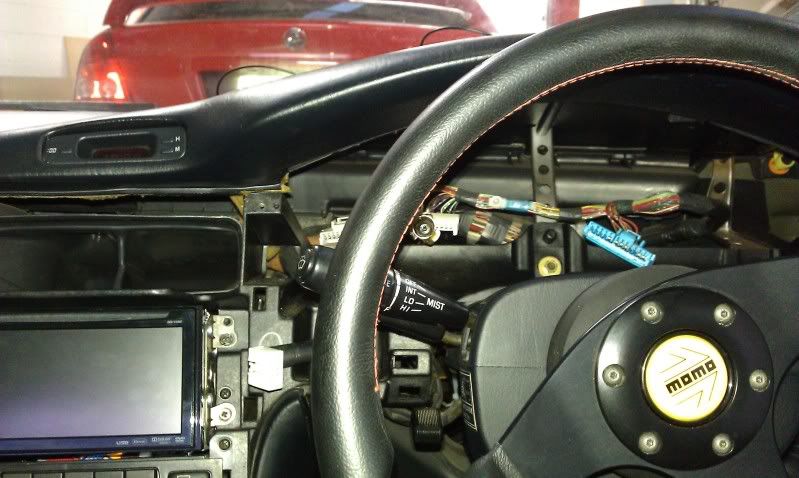
Dash disassembled:


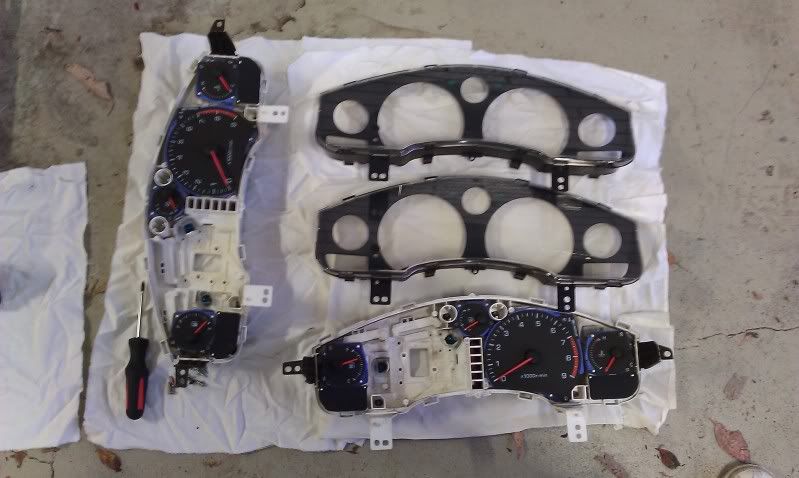
Instrument clusters (I'm taking the TRD speedo out of the one I just got and putting it into mine, for peace of mind):
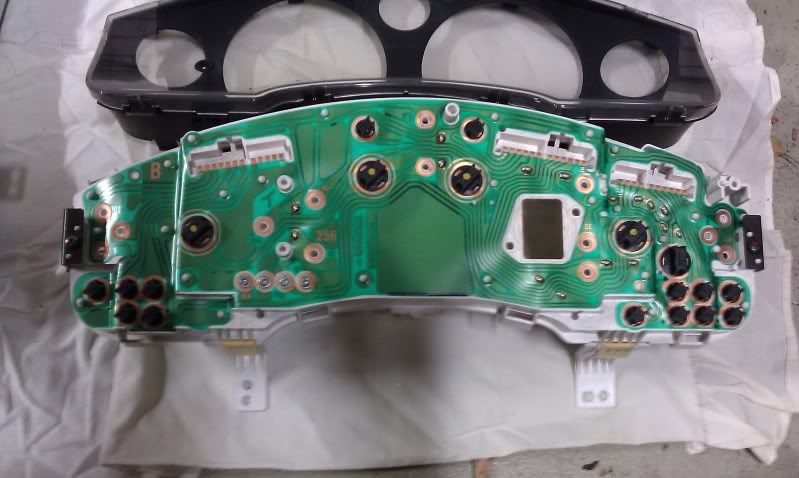

Back of my cluster:


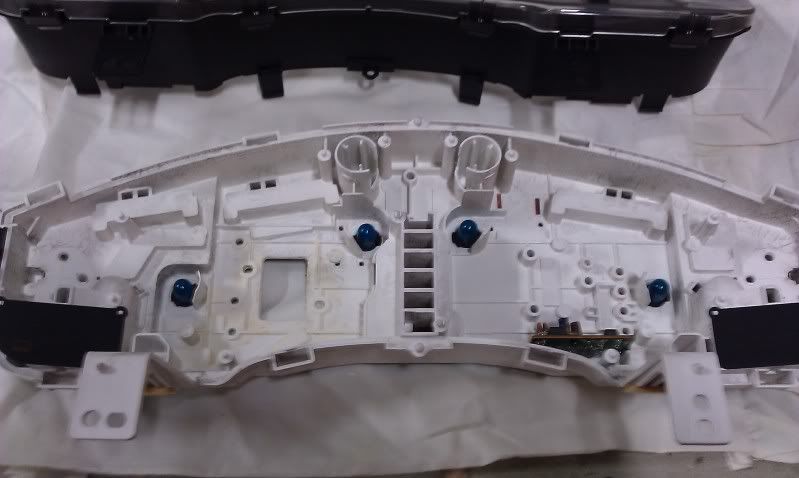
Front of cluster after taking all the gauges out:


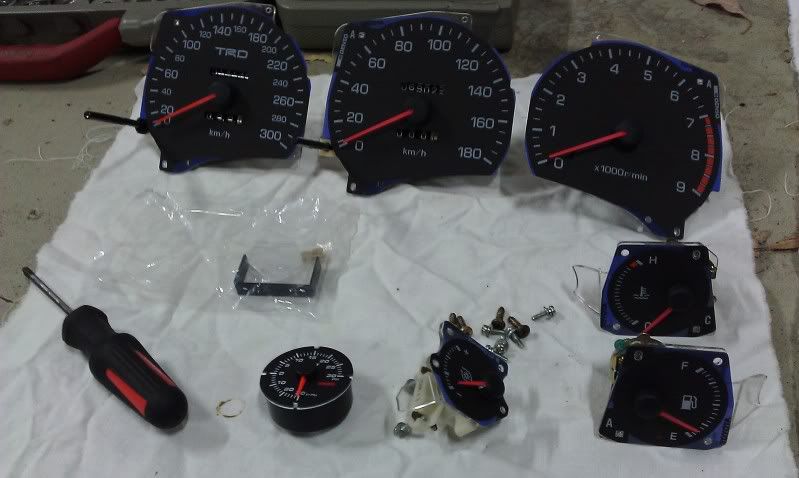
All the gauges separate:


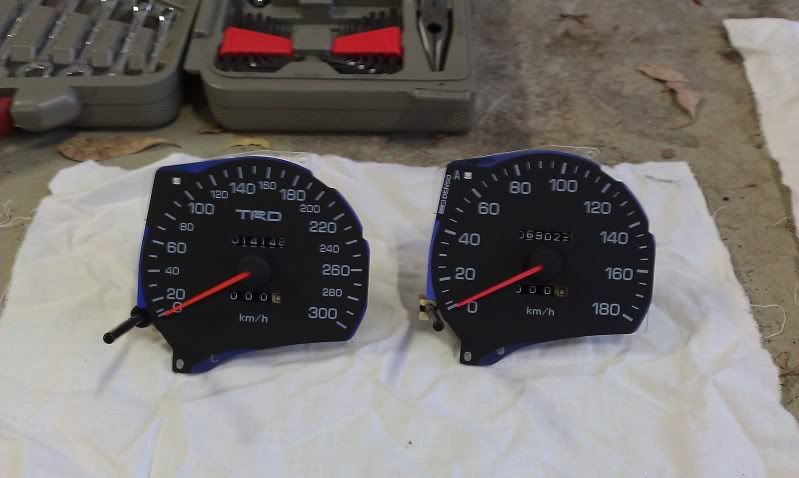
300km/h TRD speedo and stock 180km/h speedo, both mechanical:


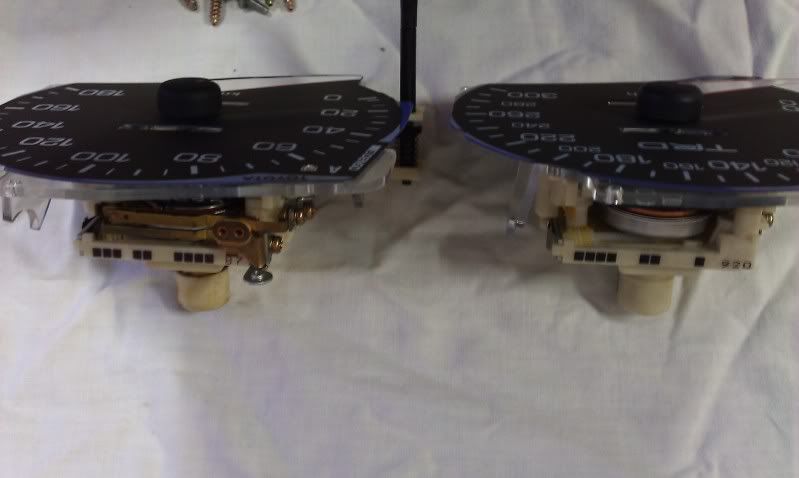
Top of both speedos (there's a brass thing on top of the stock one, but not on the TRD one, which looks like a trigger for an over-speed buzzer on the stock one):


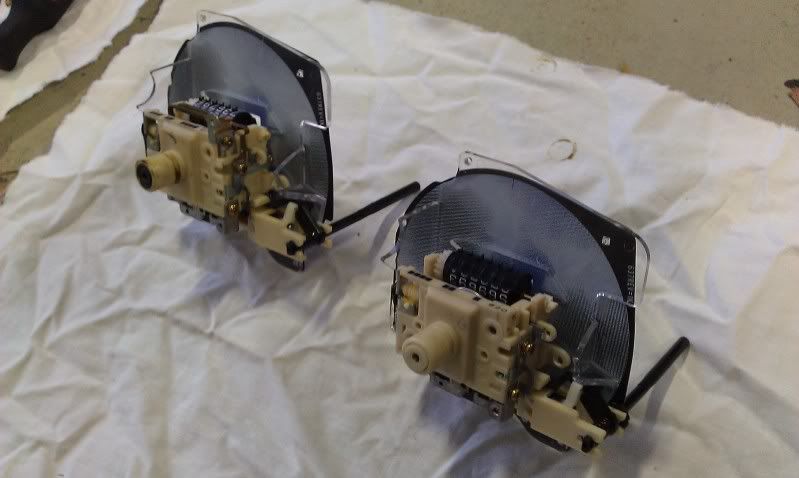
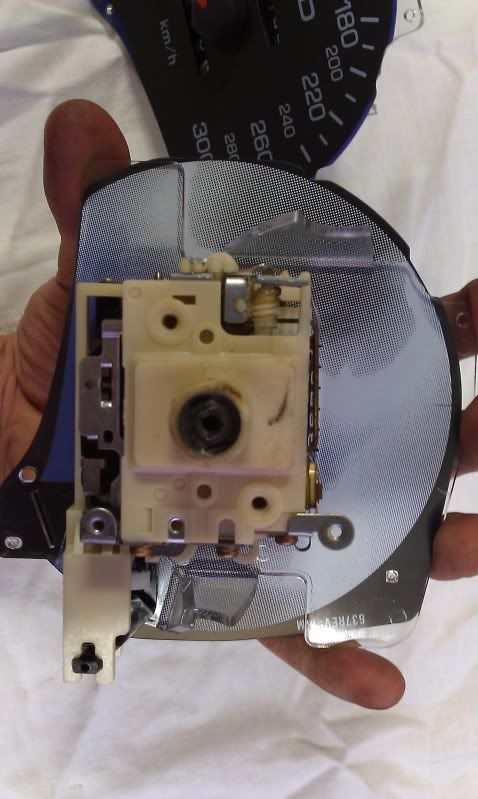
Back of speedo, notice the purple mentioned previously (I need to clarify with Bionikal which region he was referring to specifically):


Once the white LEDs arrive I'll install those in the cluster, and I still need to wire up and attach the Omori boost gauge to the cluster.

Bionikal...to sand back the purple as you mentioned, do I need to carefully pull the needles off the gauges so I can remove the transparencies? Do I need to sand it from the back (the side shown in the last pic), and only in areas where light is supposed to shine through I guess?

Also a general question for anyone who might know, can I take the odometer out of my stock speedo and put it into the new one, or is it too fiddly?


2010/12/18 07:41:04
Bionikal
Hi rob,

sand the side thats 'whiteish' in the photo above. You will need to remove the needles. they simple pry upwards. Make a note of where they are all sitting before you do it, that or recalibrate them later (i can explain this later).

Put the gauge face down on a towel, get some 800 wet and dry and go to town on the numbers and the lines. I left the center standard. My advice is to do it to the spare 180km speedo first. Last thing you want to do is stuff up a TRD one.

I can explain more with images on MSN if you want - Cant be bothered uploading :p
2010/12/21 17:07:41
robk
I've now run the hose and damper for the pressure sensor for the Omori gauge (including the annoying task of running stuff from the engine bay through the right door sill and up to the dash), and I've spent a few hours confirming and labeling the various electrical traces on the back of the cluster. My MR2 wiring diagram agreed with all the wire colours/functions for the plugs to the back of the cluster, but the locations of each wire in the plugs were different to the diagram, so that really confused things. Maybe my diagram is for US/RHD cars or something, but it's sorted now anyway.
2010/12/22 14:12:03
robk
Bionikal sent me this pic showing where he has sanded the purple off the back of one of the gauges (he is still testing it though, it may not be the end result):

2010/12/27 10:33:52
Bionikal
Heres a comparison aswell rob.
This shows what it was (temp) and what it now is (everything else)

2010/12/27 11:03:20
robk
Thanks for that Mark! It looks like you have done a great job, with no hotspots too.
When my white LEDs arrived on friday and I installed them and tried it, I thought it looked alright before removing the purple tinge, but seeing your pic above it looks heaps better in pure white
BTW, what's with the tacho needle?
2010/12/27 14:01:37
Bionikal
its in the experimental phase :p

im playing with some new ideas.
2010/12/27 15:19:51
surok
i like what you did with the volt meter needle
2011/04/01 00:05:07
robk
Tonight I was very busy finishing off my instrument cluster.

This shows 2 of the 4 white LEDs in place of the stock bulbs:


This is the gauge faces after sanding the purple off the back (ignore the black pen marks, I drew them on there so I could identify things more easily):


This is after dealing with the hotspots (where the brightness is more concentrated), I originally used reflex paper but it was too thick so I started again with the thinner paper shown here:


This is my copy of cogs' PWM dimmer circuit for the Omori boost gauge illumination:


Wiring of Omori boost gauge to cluster (the 4 adjacent holes at the top are where the stock boost gauge signal conditioning circuit normally attaches, but this was removed, so I put my dimmer circuit in the same spot and fed the wires through one of the 4 holes):


End result!...


When mounting the Omori boost gauge to the cluster, I took the easy way out...I used hot glue, because the Omori gauge fits really nicely into the space anyway so I just needed to stop it moving (I forgot to get a photo). It also meant that I could apply the glue then quickly fit the front of the cluster so the glue would set with the gauge in the perfect location.

I'm very happy with how it all turned out. Thanks to cogs and Bionikal for their help!
2011/04/01 00:14:38
surok
dammit now we have the same cluster
<< ..5758.. >> - Powered by APG vNext Trial
© 2025 APG vNext Trial Version 5.5

Use My Existing Forum Account

Use My Social Media Account