• SHOWROOM
  • 1990 mr2 Ferrari replica (p.2)
2014/02/27 22:01:23
jazza
Yeah that's all I could be bothered writing last night I'll add more photos and more of the build tonight
2014/03/12 00:15:25
jazza
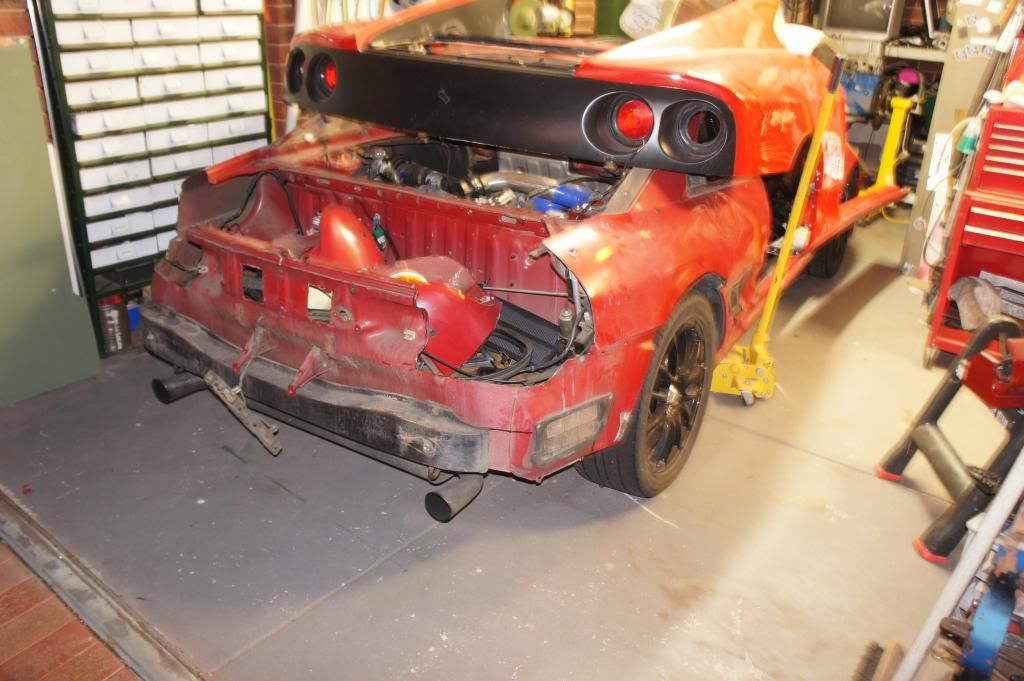
Ok I'll write up a little more on the build, the fit up on these kits Is fairly easy all the removable panels get unbolted .once all the panels are removed its time for a few modifications to the body the rear quarter panels have to be cut around we're the the old tail lights bolt in as seen in these


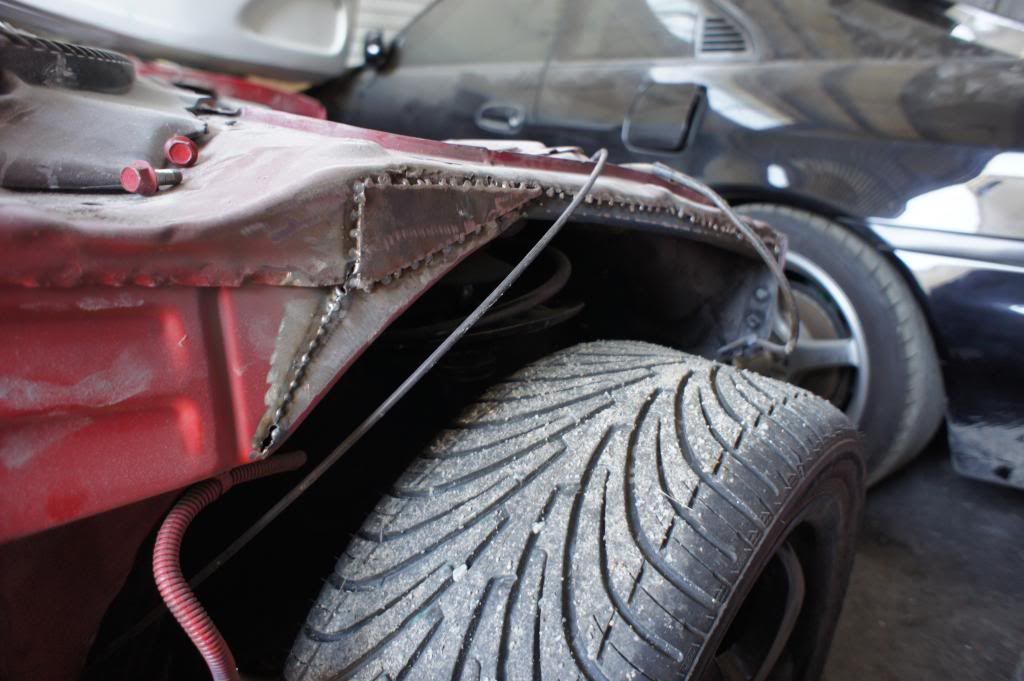
And then the wheel arches need to be raised because of the extra width of the body otherwise the car wont have hardly any suspension I don't have before photos of the arch trim just afters basically on the rear just tapered them up to about 3 inches higher at the top and re welded fully to keep strength and the front was a similar task

There's a few other little things needed to do like the window washer squirters need to be installed into the cowl panel the rear quarter window glass has to be raised up as high as possible. the rear boot lock has to be mounted in a way that the rear boot mech/latch will still work that's basically all that was needed prior to the main part of the shell to be installed (it's the roof rear quarters and side skirts in one piece) this part of the kit is bonded on I just used a ****load of sikaflex 227 and took a grinder to the mr2 to roughen the surface to hold strong. The roof line of the kit meets the original mr2 half way along the roof line so I fiberglassed the kit to the car at the roofline and blended it in any way you can see the kit in the above photo sitting on the car ready to be fitted this photo is one of my trial fittings

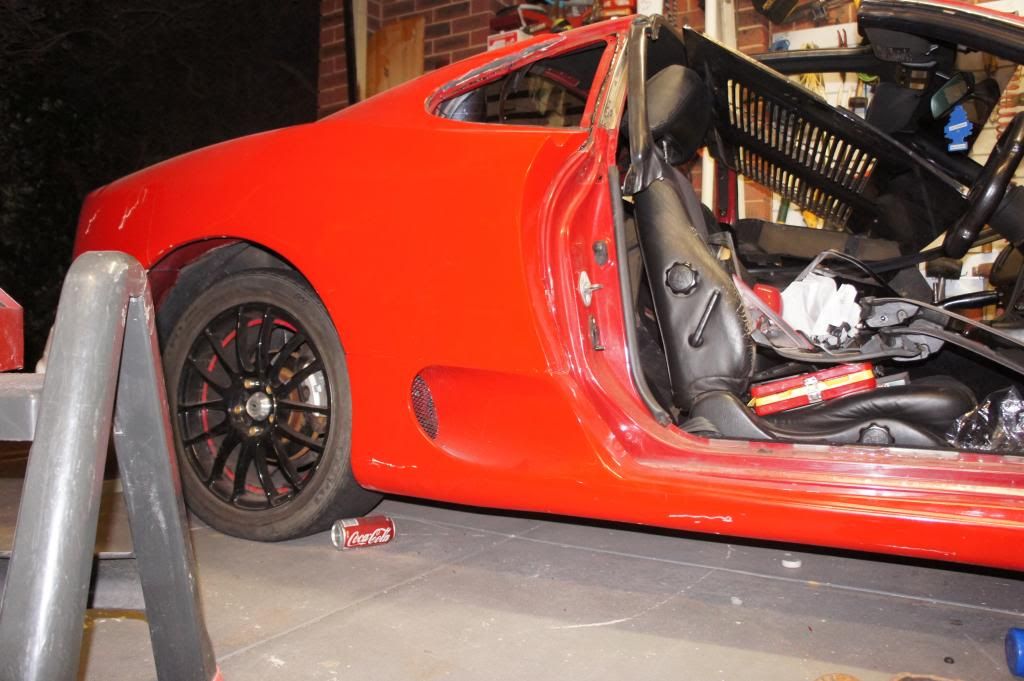
On the sills a piece of angle iron is welded and the Ferrari skirts are countersink screwed to this
Then the bumper is installed three studs were bonded to the bumper and bolted onto the car. It is then bonded to the top half of the kit with trusty sikaflex so it's non removable from the point but that's just the way it goes the doors were next and that was just a bolt on door when I bought the kit I swapped Leon (beyond custom) for my standard doors for his Ferrari ones that were all ready to go so that saved me a heap of time there was a hole in the outer skins were the handle mechanism was modified to a different set up so I just filled that in. That was all for the doors.
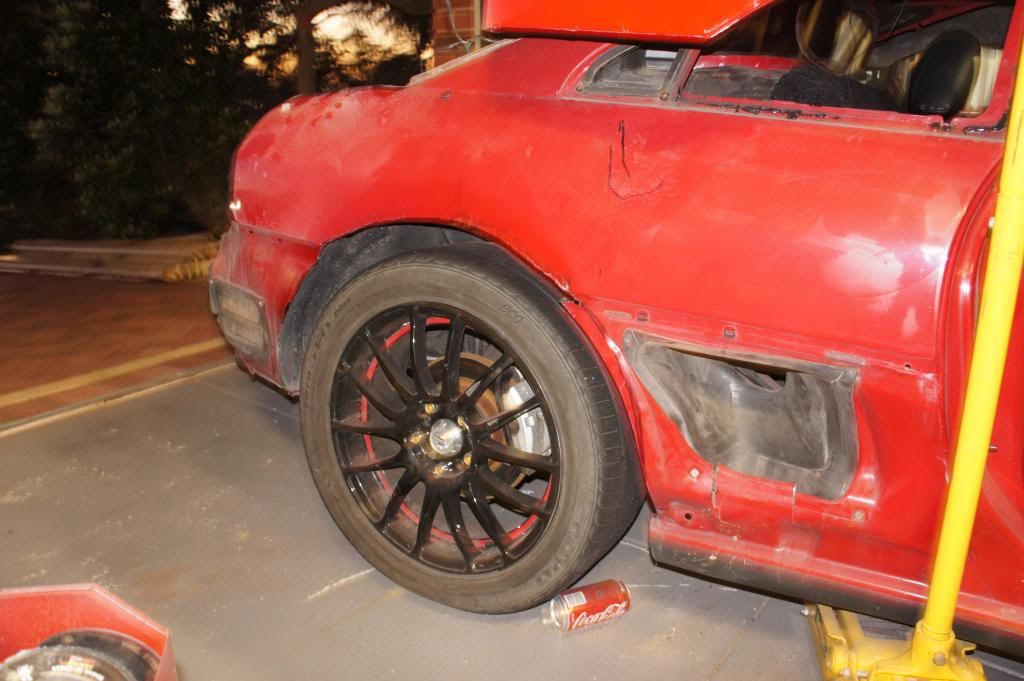
The front clip was a hole piece like the rear (front quarters and bumper are all one) there is a bumper bracket that needs to be cut but that's about it apart from The arch trim/inner fender as seen earlier, a custom bumper support is made/bolted on there is a few mounts that I bonded to the body I wanted to keep the front clip as removable as possible but that's the Main assembly of the kit I'll update more later
2014/03/17 00:39:14
SonicShadow
Wow that's awesome
2014/03/17 15:31:01
dennis the menace
Yep, awesome in a somewhat special way.  How did the panel look after it was welded fully to keep strength?
2014/03/17 21:33:29
banner
Impressive skill and craftsmanship.  Its a great read. Looking forward to more posts.
2014/03/17 22:34:37
kameleon
Well this is not as train wreck as usual.
 
And Greddy Es' old car!!!!!! funny to see his car has come so far.
 
Keep posting pics, that hardtop replica is pretty damn good as far as they go.
2014/03/19 01:43:57
jazza
dennis the menace
Yep, awesome in a somewhat special way.  How did the panel look after it was welded fully to keep strength?

I'm glad you like it I wasn't overly concerned about what the panel looked like, it's under a fiberglass shell but if your questioning if i welded in one continuous bead causing the panel to warp from overheating I didn't think that much detail was needed stitch one inch move to the other side and so on keeping it cool as possible
2014/03/19 14:41:55
maj
This is very cool but I'll make it clear from an engineering perspective only.
 
As a famous guitarist once said "Ferrari are like Da Vinci on wheels, you don't mess with them", I tend to agree that you aren't really getting closer to owning one by doing this.
 
I remember a few years ago in Newcastle I spotted what I thought was a Ferrari 355, came a bit closer and it didn't look quite right to me. Stopped at the next set of traffic lights and thought it was a bit quiet, it then proceed to rev indicating he wanted to race (I was in my soobie at the time). I smirked and proceeded to smoke him off the line.
Sure enough it was a turbo SW20, sounded pretty stock to me too.
 
I'm all for building unique cars and all, just please do not throw a badge on this and call it a Ferrari :)
 
That said though, I'm liking the shape of this replica kit, looks really cool. I assume it's going to be a hardtop?
2014/03/19 21:20:15
jazza
@maj I do agree it will never be close to a Ferrari the only goal is to replicate what one looks like, it's more of a joke I never tell people it's a Ferrari I let them make their own decision but on the other hand a genuine Ferrari is very high maintenance and the 360 isn't an excessively fast car, a standard one runs a low 13sec quarter, the engine I'm running it should be able to smoke that and be fairly reliable .
As for hardtop I'm a little disappointed I didn't choose to when I was in the body work stage but I will make it hard top eventually
2014/11/25 00:40:23
greddy_es
OMG!!!I can't believe my eyes!I'm glad you have given the old gal a 2nd chance at life!Good on you and thanks for giving her a new hot bod!I heard from a mate that she's gone to Mandurah but never thought i'd see it again after all these yrs.She has served me well and i hope she'll keep going for you for a long time to come!Good stuff!

Oh,regarding the insurance bit,it was insured as a 1990 Turbo MR2,not sure why it said otherwise when you saw it at the Auctions.Other stuff,well let's just say it was put back to stock before it was driven and handed in to Manheim.
12 - Powered by APG vNext Trial
© 2025 APG vNext Trial Version 5.5

Use My Existing Forum Account

Use My Social Media Account